
Soft Sourdough Sandwich Bread
We may earn money from the products/companies mentioned in this post. As an Amazon Associate I earn from qualifying purchases.
How to Make Soft Sourdough Sandwich Bread – The Easy Sandwich Loaf You’ll Love!
If you love the flavor of sourdough but wish for a softer crust and a fluffy texture perfect for sandwiches, then this soft sourdough sandwich bread recipe is for you.
In this post, I’ll walk you through exactly how to make a soft, simple, and delicious sourdough sandwich loaf that’s practically foolproof — even if you're new to sourdough!
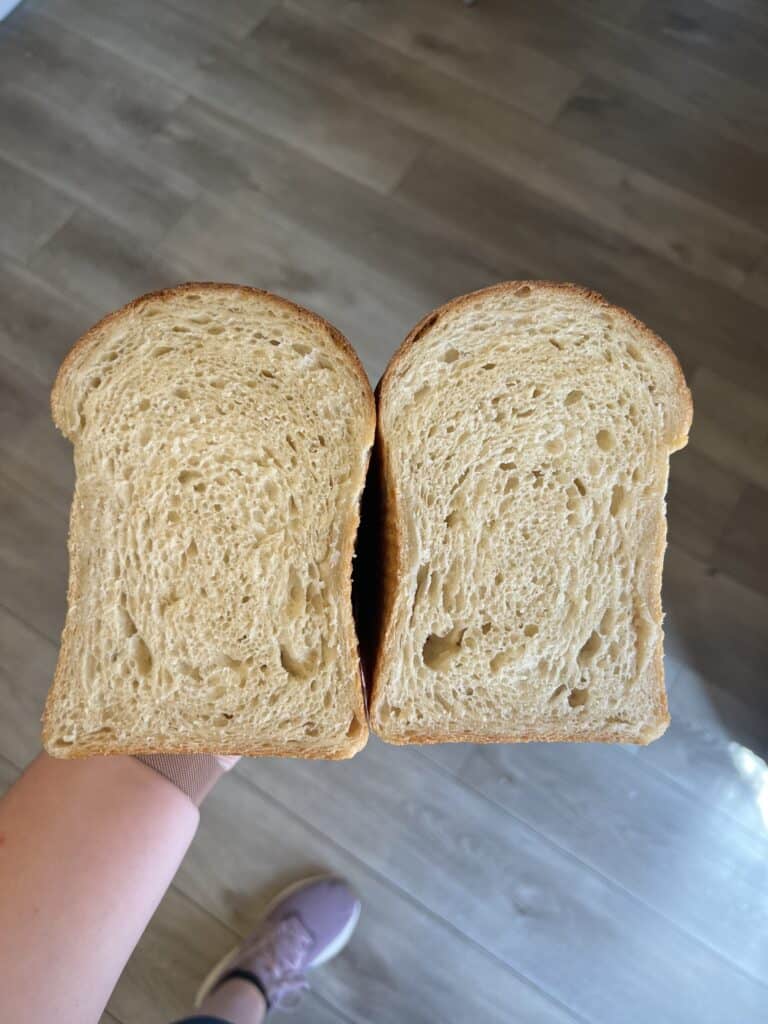
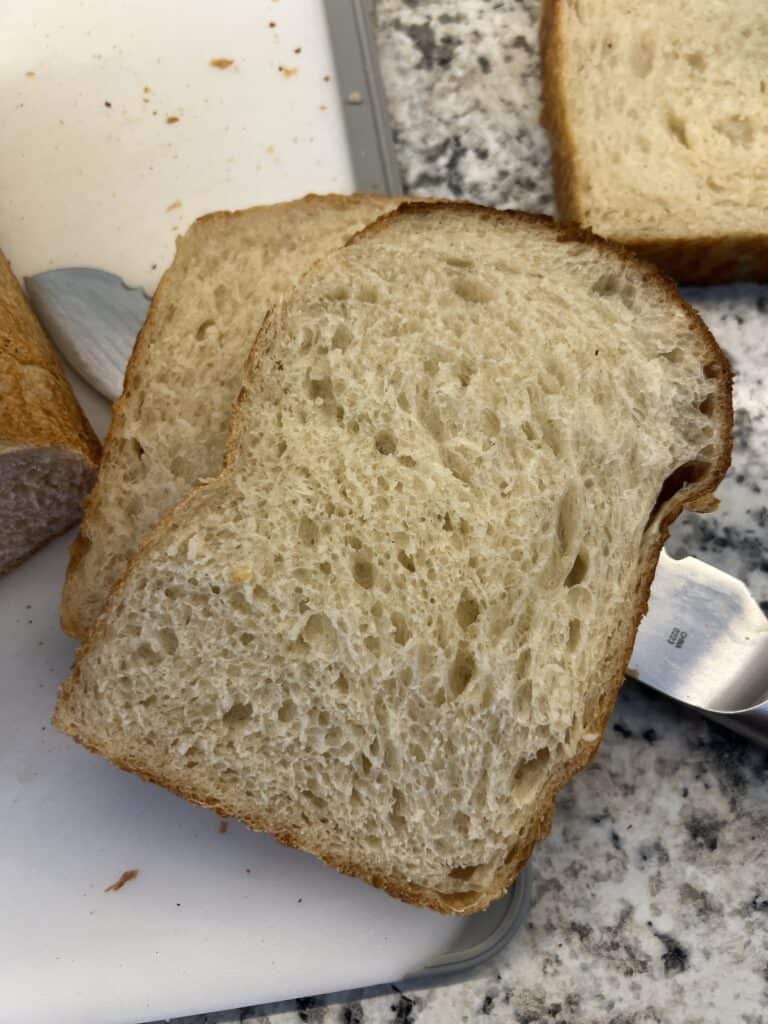
Unlike traditional artisan sourdough with its crackly crust and rustic round shape, this easy sourdough sandwich bread has a soft crust, gentle chew, and tender crumb that’s perfect for toast, sandwiches, or even just slathered in butter straight from the oven.
And the best part? It’s super flexible — no rigid baking schedule here! If sourdough has felt overwhelming in the past, this recipe is the gentle start you’ve been waiting for.
You can make one sourdough loaf or two - the recipe makes two, but if you only want one loaf, halve the ingredients!
This is my family's favorite sourdough recipe - it's the best sourdough sandwich bread! (Of course, they also enjoy my other sourdough bread recipes!)
What Makes Sourdough Sandwich Bread Different from Artisan Loaves?
Classic sourdough (the artisan loaf) is beautiful, but it’s not always the most practical bread for everyday use. The crust is crunchy (sometimes too crunchy), and the shape isn’t ideal for sandwiches or lunchbox slices.
Sourdough sandwich bread, on the other hand, is made specifically to be soft, fluffy, and sliceable.
It’s baked in a loaf pan, rises higher, and has a gentle crust that won’t scratch the roof of your mouth. This soft sourdough sandwich loaf is everything you love about sourdough – tangy flavor, health benefits, and natural fermentation – in a shape and texture your whole family will love.
What’s the Best Flour for this sourdough recipe?
When it comes to making a soft sourdough sandwich bread, flour matters!
I love using unbleached all-purpose flour because it gives a tender crumb, but you can also use bread flour for a little more structure and protein.
Watch my sourdough sandwich bread video and see step by step how to make this bread!
Why Is Your Sourdough Starter So Important?
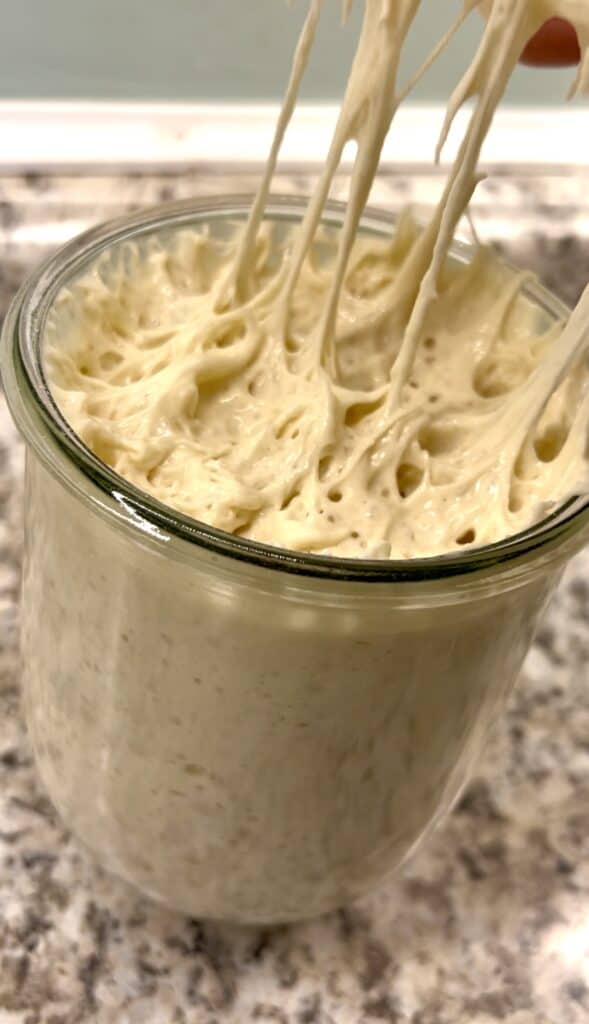
A bubbly sourdough starter is the heart of any great sourdough bread. It’s what helps your bread rise, gives it flavor, and makes it naturally fermented and gut-friendly.
In this recipe, I used my newest starter, Betty Bubbles — just over a month old and thriving! You want an active sourdough starter that has been recently fed and is full of bubbles when you’re ready to bake.
I maintain that my starter using a zero-discard method — you can learn more here: Zero Discard Sourdough Starter: Never Discard Again.
Pro Tip: Feed your sourdough starter the night before you plan to mix your dough, and let it ferment at room temperature overnight for best results.
How to Feed and Prep Your Starter for the Perfect Loaf
Here’s my starter feeding routine:
- 100g of starter
- 200g of unbleached all-purpose flour
- 200g of filtered or bottled water (I warm it slightly to about 100°F)
Mix it in a jar (I love using Weck jars) and leave it overnight. By morning, it should be bubbly, risen, and ready to use in your sourdough sandwich bread recipe.
What Tools Do You Really Need to Make Sourdough Bread?
Don’t let the internet over-complicate it! You only need three things for simple sourdough:
- A kitchen scale (measuring in grams is way more accurate)
- A large bowl for mixing and proofing your dough
- A loaf pan (I use USA Pullman pans, but you can use any bread pan)
- Oh, and of course, some active starter
Bonus: A bread lame for scoring and a dish towel to keep your dough moist during bulk fermentation.
Step-by-Step: How to Mix Your Dough for Sandwich Bread
Start by combining the following in your mixing bowl:
- Water (filtered, warm)
- Active sourdough starter
- Honey (or another sweetener)
- Salt
- Flour
Mix everything together until it forms a shaggy dough. It won’t look smooth or elastic yet – that’s okay! After mixing, let it rest covered with a damp towel for 30 minutes before your first stretch and fold.
Baking schedule for soft sourdough sandwich bread
This is one of the most forgiving sourdough recipes you’ll ever find. After your initial stretch and folds, you can leave the dough to rise for 6–12 hours at room temperature, depending on your schedule.
Don’t stress over the exact timing. You can do one or two stretch and folds, then go about your day.
Or you can mix up the bread before you go to bed at night. Do one set of stretch and folds and cover it with a damp towel. Let it rise all night and then shape into loaves the next morning!
Be sure to watch the video for this recipe to see exactly what I do!
How to Shape a Sourdough Sandwich Loaf
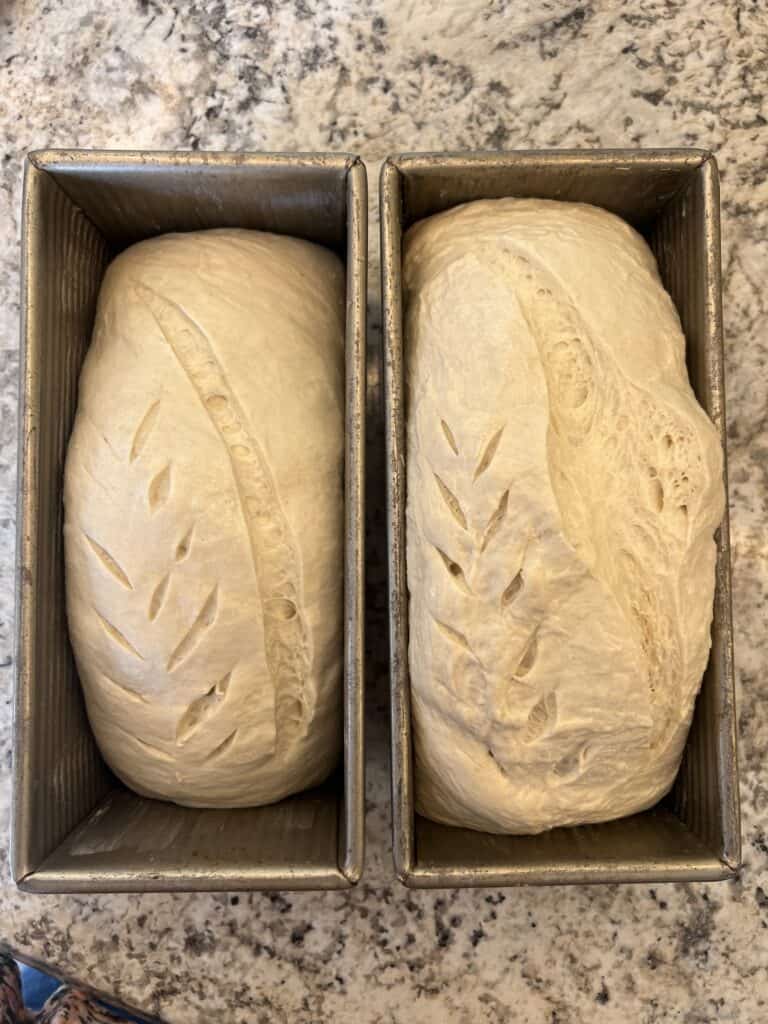
To shape your loaf, turn the dough out onto a floured surface, divide it in half (if making two), and gently fold and roll it into a loaf shape.
Butter your loaf pan (yes, butter works better than spray!) and drop your shaped dough inside, seam side down.
Cover the loaves (I put mine in grocery bags and tie them shut). Place in the refrigerator overnight.
The soft sourdough sandwich structure comes from a gentle shaping process that protects those beautiful bubbles without completely deflating the dough.
The Second Rise: How Long Is Too Long?
After shaping, the second rise is the final proof before baking. You want your dough to rise until it’s just above the edge of your loaf pan.
If you have time, you can leave the pans out after shaping the loaves until they have nearly reached the top of the pan, then put them in the refrigerator overnight for a cold ferment.
In the morning, take your loaves out of the refrigerator. If they have risen to the top of the pan (or above), they're ready to bake. If they aren't quite there yet, just let them set out until they've risen.
Your baking schedule can be super flexible here. That’s the magic of simple sourdough!
Baking Your Bread: Timing, Temperature, and Tools
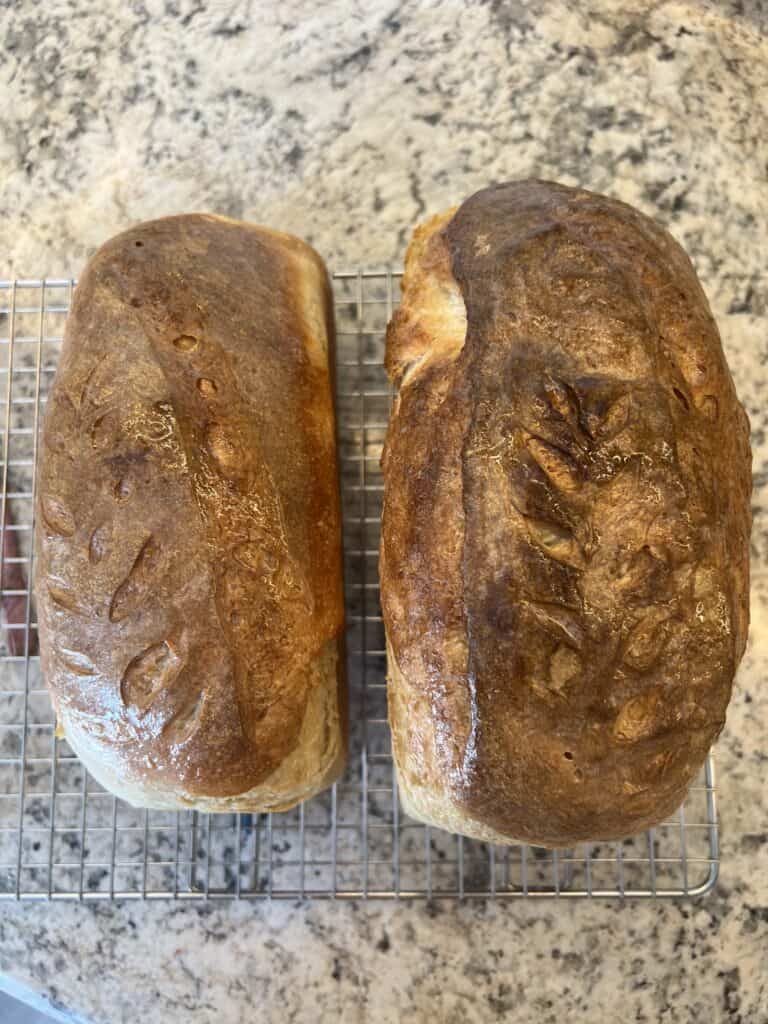
Preheat your oven to 400°F and bake your loaves for 35 minutes. If using a Pullman pan, you can leave the lid off for a taller rise.
Once baked, rub butter over the tops while still hot. This keeps the crust super soft and delicious.
Let the loaves cool on a wire rack before slicing (if you can wait that long!).


Soft Sourdough Sandwich Bread
Equipment
- 1 Weck Jar for feeding starter
Ingredients
- 655 Grams Filtered Water Warm, About 100°F
- 265 Grams Active Bubbly Sourdough Starter
- 18 Grams Salt
- 130 Grams Honey Sugar, or Sugar Substitute
- 1000 Grams Unbleached All-Purpose Flour
Instructions
Mix the Dough
- In a large bowl, combine the warm water and active sourdough starter. Stir until mostly dissolved.
- Add the honey (or other sweetener), salt, and flour. Mix until a shaggy dough forms.
Rest and Stretch & Fold
- Cover the bowl with a damp towel and let rest for 30 minutes.
- After resting, perform a set of stretch and folds (lift and fold the dough over itself, turning the bowl as you go, about 4 times).
- If desired, repeat another 1–2 times over the next few hours. (I've skipped this step before, and it still turned out great.)
Bulk Fermentation
- Cover the dough and let it rise at room temperature for 6–10 hours until it has doubled in size and looks bubbly and jiggly.
Shape the Loaves
- Turn the dough out onto a lightly floured surface. Divide in half (no need to be exact unless you want even loaves).
- Gently shape each into a Loaf. (See video for full instructions)
Prepare the Pans
- Butter two loaf pans thoroughly (no spray oils – real butter works best). Place the shaped dough into the pans, seam side down.
Second Rise
- Let the loaves rise at room temperature until they’re nearly to the top of the pans (about 1–2 hours), then cover and put in the refrigerator overnight.
Bake
- In the morning, or when you are ready to bake, preheat the oven to 400°F.
- Score the tops with a bread lame and bake for 35 minutes, or until golden brown.
- Remove from oven and immediately rub the tops with butter for a soft crust.
- Let cool in the pans for 5 minutes, then transfer to a wire rack to cool completely before slicing.